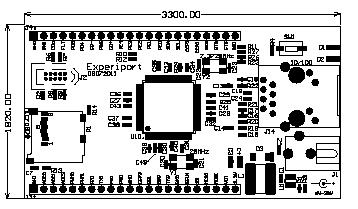
The experiport is an Ethernet based controller board based on the TI LM3S6432 50MHz Cortex-M3 microcontroller. This board brings out the GPIO, ADC, I2C, SPI and USART to two 22 pin connectors and Ethernet through a RJ45 jack with magnetics and link/active LEDs. It takes 6V to 38VDC to power the board through a 2.1mm jack. It is two layer with dimensions 1.8″ x 3.925″. There is an standard SD card holder with SPI interface. It has an two additional LEDs, a push button and standard 10 pin tag-connect pads for JTAG. The board can be constructed with the hot plate technique.
I wanted a low cost Ethernet controller for a variety of projects including the AC power controller for my lab. What I liked about the LM3S6432 was that the PHY was built in which was meant less complex, smaller size and lower cost.
experiport schematic (1286 downloads)
Experiport Assembly Drawing (.pdf) (625 downloads)
experiport PCB Artwork (.pdf) (643 downloads)
experiport BOM (.xls) (662 downloads)
Software
Development Tools
I’d rather have decent libraries than another IDE and that is what TI/Luminary Micro provided. I use the CodeSourcery (now owned by Mentor Graphics) gcc toolset for most of my ARM/Cortex development. TI has driver libraries and examples for all Cortex parts in their Stellarisware package. I usually can get cygwin to do the cross compile for me and just customize my own makefile/linker script for the application. The board level include file is experiport include file (1031 downloads) .
Bootloader
The experiport bootloader is the Chen fatfs and SD card drivers. It looks in the top level directory for image.bin file. It this is the same as what is in flash, it just starts the application; otherwise, it reads the image.bin and writes it to flash.
Main application
The main application uses the Adam Dunkel’s lwip tcp/ip stack and the httpserver-raw contribution for web based. I also have telnet server application written for command line to the controller.
Since there are no boards out in the wild yet, it wouldn’t be terribly helpful to post the code for it. The cost of parts and PCB is around $30 each and the assembly cost is at least that much to make a hundred or so. Not sure if there is any interest at > $70 price so didn’t pursue it much further than for a few friends and myself.
